Version 1.107 is now available! Read about the new features and fixes from November.
Dismiss this update
AI Toolkit provides comprehensive support for a wide variety of generative AI models, including both Small Language Models (SLMs) and Large Language Models (LLMs).
Within the model catalog, you can explore and utilize models from multiple hosting sources:
Deploy models directly to Foundry from within the model catalog, streamlining your workflow.
Use Microsoft Foundry, Foundry Local, and GitHub models added to AI Toolkit with GitHub Copilot. For more information, check out Changing the model for chat conversations.
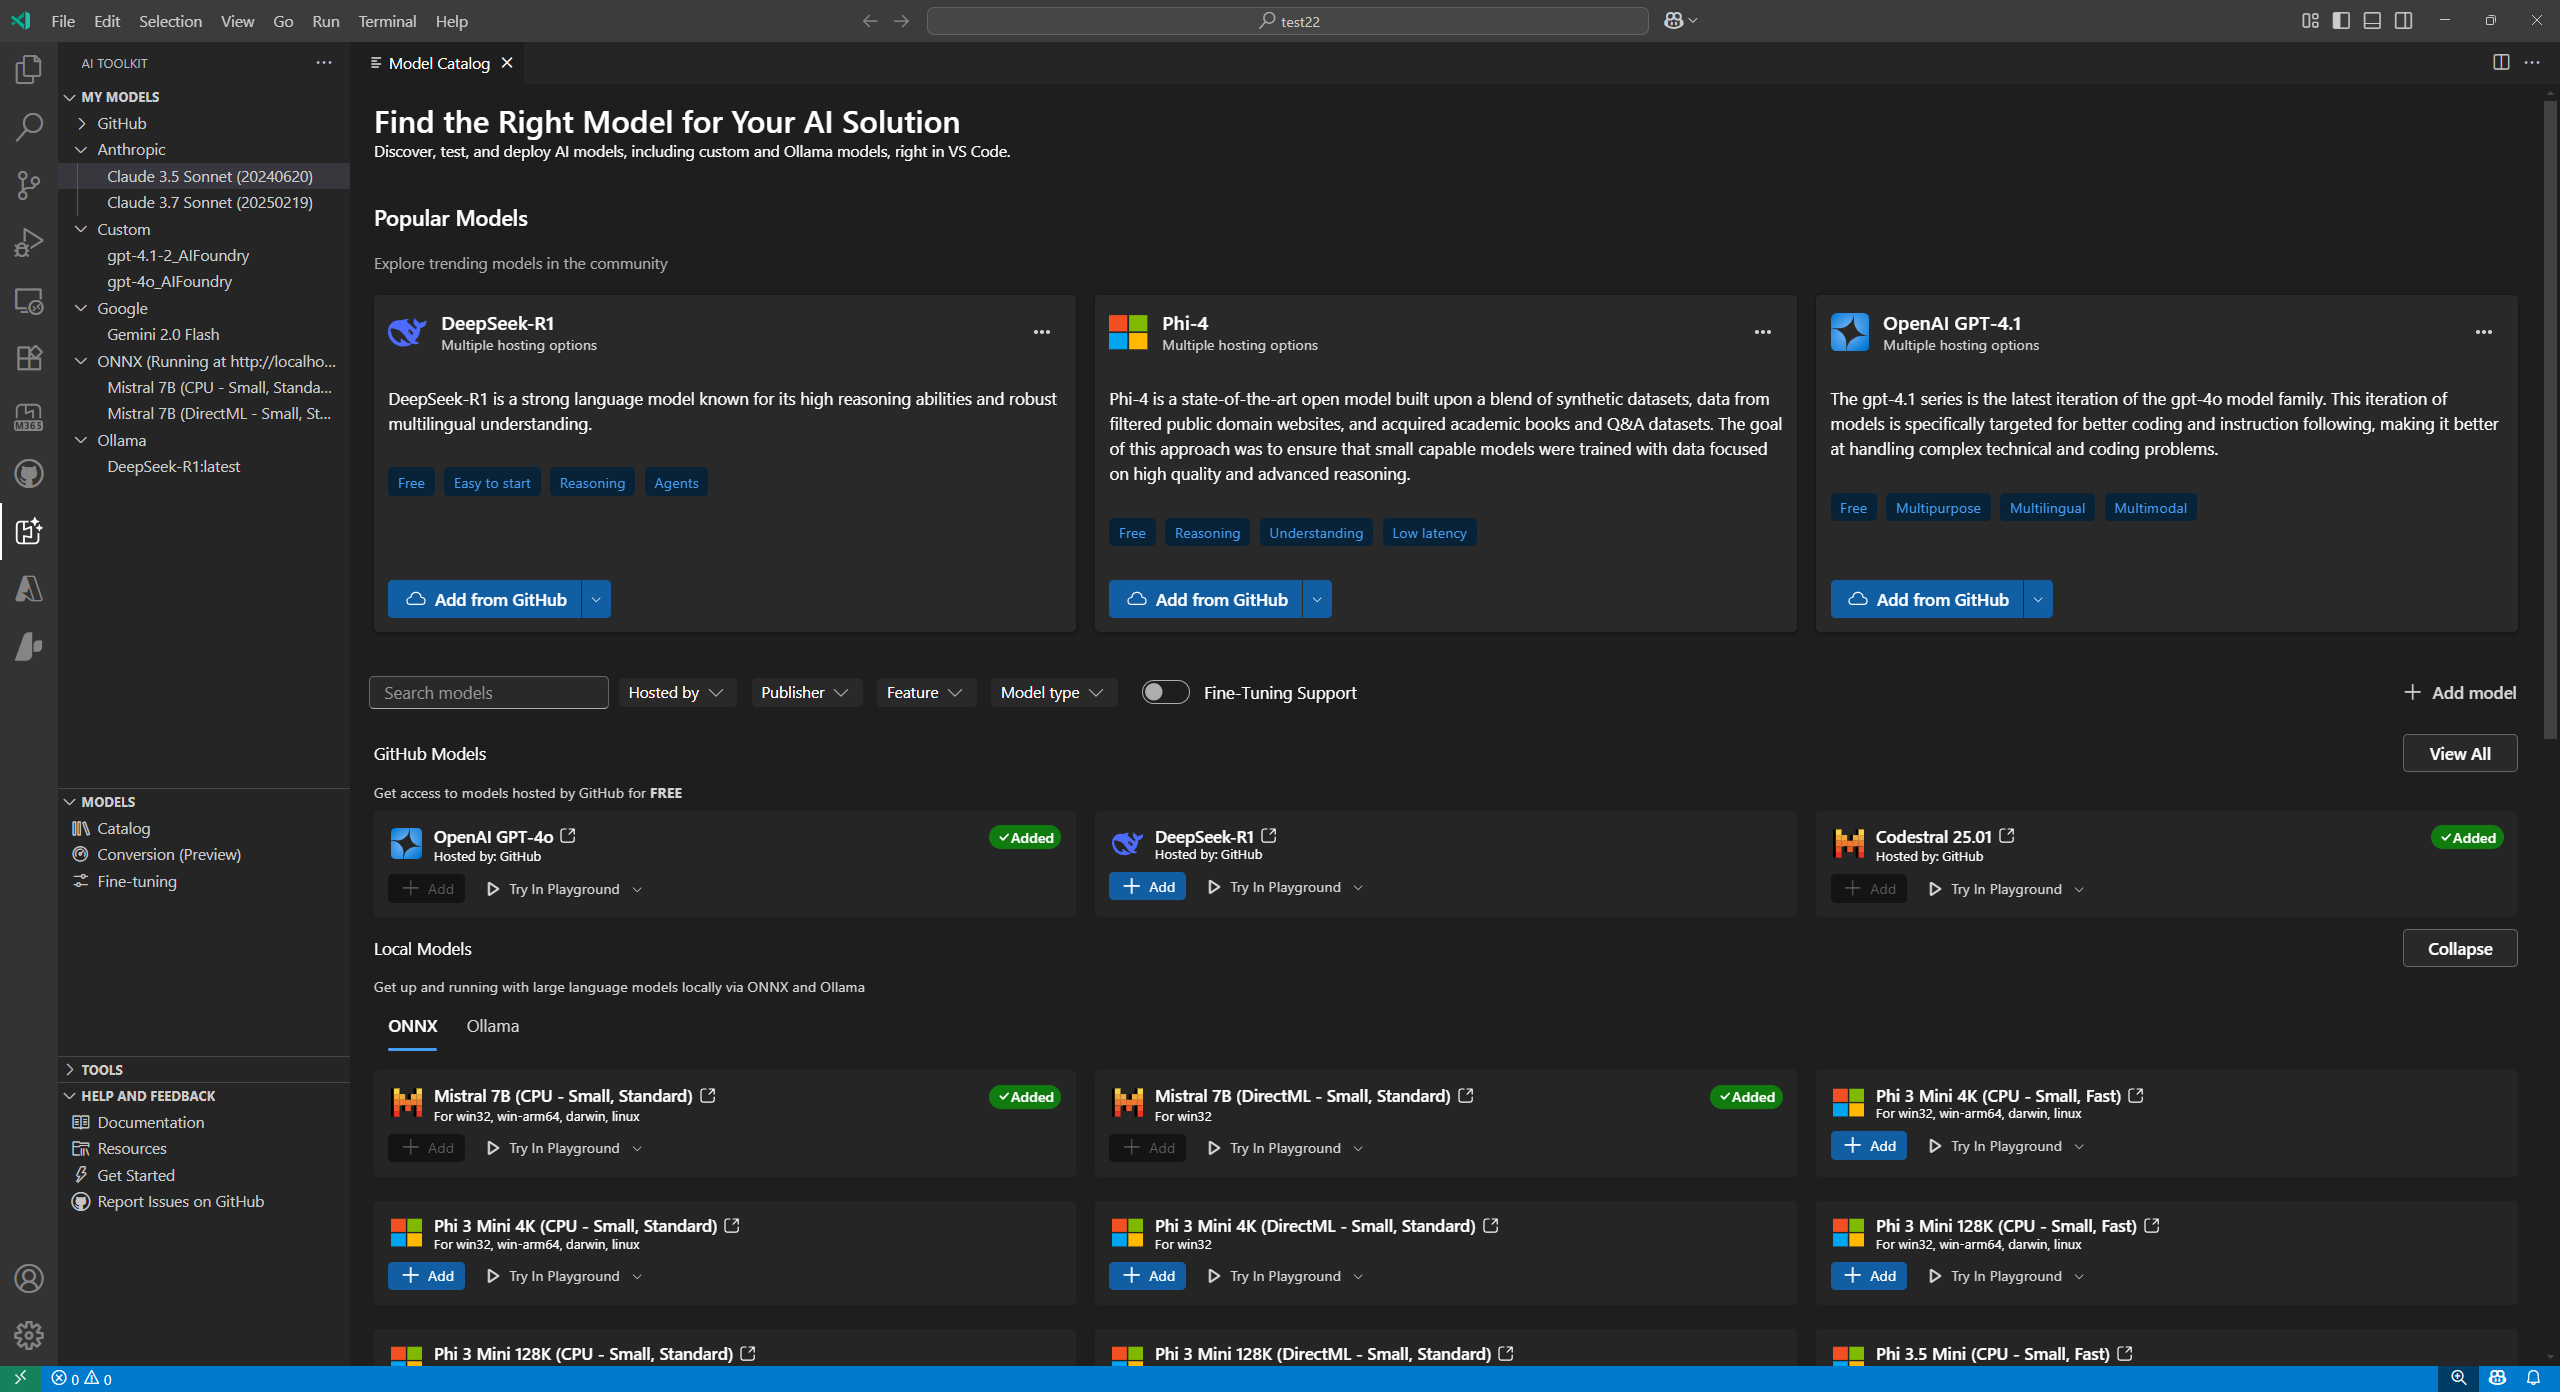
To find a model in the model catalog:
Select the AI Toolkit view in the Activity Bar
Select MODELS > Catalog to open the model catalog
Use the filters to reduce the list of available models
Text Attachment, Image Attachment, Web Search, Structured Outputs, and more.Browse the models in different categories, such as:
Alternatively, use the search box to find a specific model by name or description
To add a model from the model catalog:
Locate the model you want to add in the model catalog.
Select the Add on the model card
The flow for adding models will be slightly different based on the providers:
GitHub: AI Toolkit asks for your GitHub credentials to access the model repository. Once authenticated, the model is added directly into AI Toolkit.
AI Toolkit now supports GitHub pay-as-you-go models, so you can keep working after passing free tier limits.
ONNX: The model is downloaded from ONNX and added to AI Toolkit.
Ollama: The model is downloaded from Ollama and added to AI Toolkit.
You can edit the API key later by right-clicking the model and selecting Edit and view the encrypted value in ${HOME}/.aikt/models/my-models/yml file.
OpenAI, Anthropic, and Google: AI Toolkit prompts you to enter the API Key.
Custom models: Refer to the Add a custom model section for detailed instructions.
Once added, the model appears under MY MODELS in the tree view, and you can use it in the Playground or Agent Builder.
You can also add your own models that are hosted externally or run locally. There are several options available:
There are several entrypoints to add models to AI Toolkit:
From MY MODELS in the tree view, hover over it and select the + icon.
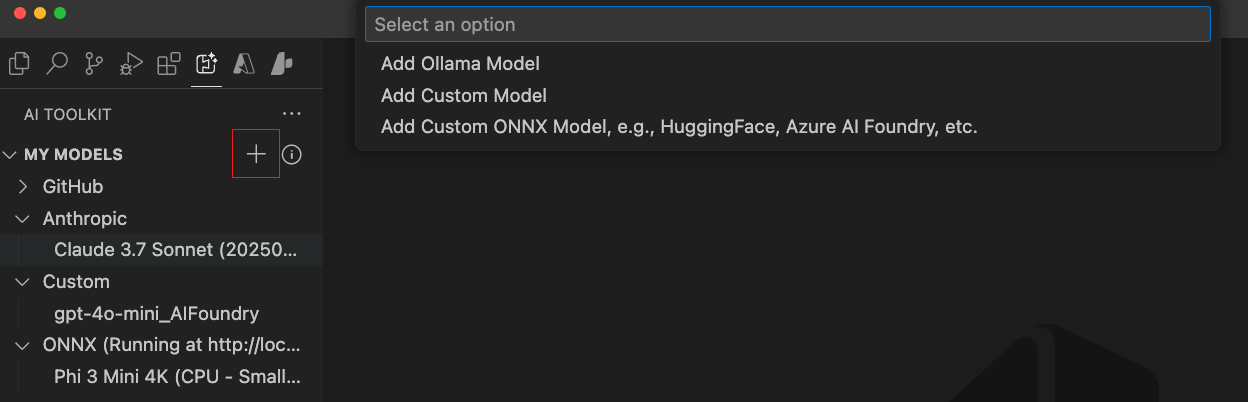
From the Model Catalog, select the + Add model button from the tool bar.

From the Add Custom Models section in the model catalog, select + Add Your Own Model.

Ollama enables many popular genAI models to run locally with CPU via GGUF quantization. If you have Ollama installed on your local machine with downloaded Ollama models, you can add them to AI Toolkit for use in the model playground.
Prerequisites for using Ollama models in AI Toolkit:
To add local Ollama into AI Toolkit
From one of the entrypoints mentioned above, select Add Ollama Model.

Next, select Select models from Ollama library
If you start the Ollama runtime at a different endpoint, choose Provide custom Ollama endpoint to specify an Ollama endpoint.
Select the models you want to add to AI Toolkit, and then select OK
AI Toolkit only shows models that are already downloaded in Ollama and not yet added to AI Toolkit. To download a model from Ollama, you can run ollama pull <model-name>. To see the list of models supported by Ollama, see the Ollama library or refer to the Ollama documentation.
You should now see the selected Ollama model(s) in the list of models in the tree view.
Attachment is not support yet for Ollama models. Since we connect to Ollama using its OpenAI compatible endpoint and it doesn't support attachments yet.
If you have a self-hosted or deployed model that is accessible from the internet with an OpenAI compatible endpoint, you can add it to AI Toolkit and use it in the playground.
To add a self-hosted or locally running Ollama model:
To add a custom ONNX model, first convert it to the AI Toolkit model format using the model conversion tool. After conversion, add the model to AI Toolkit.
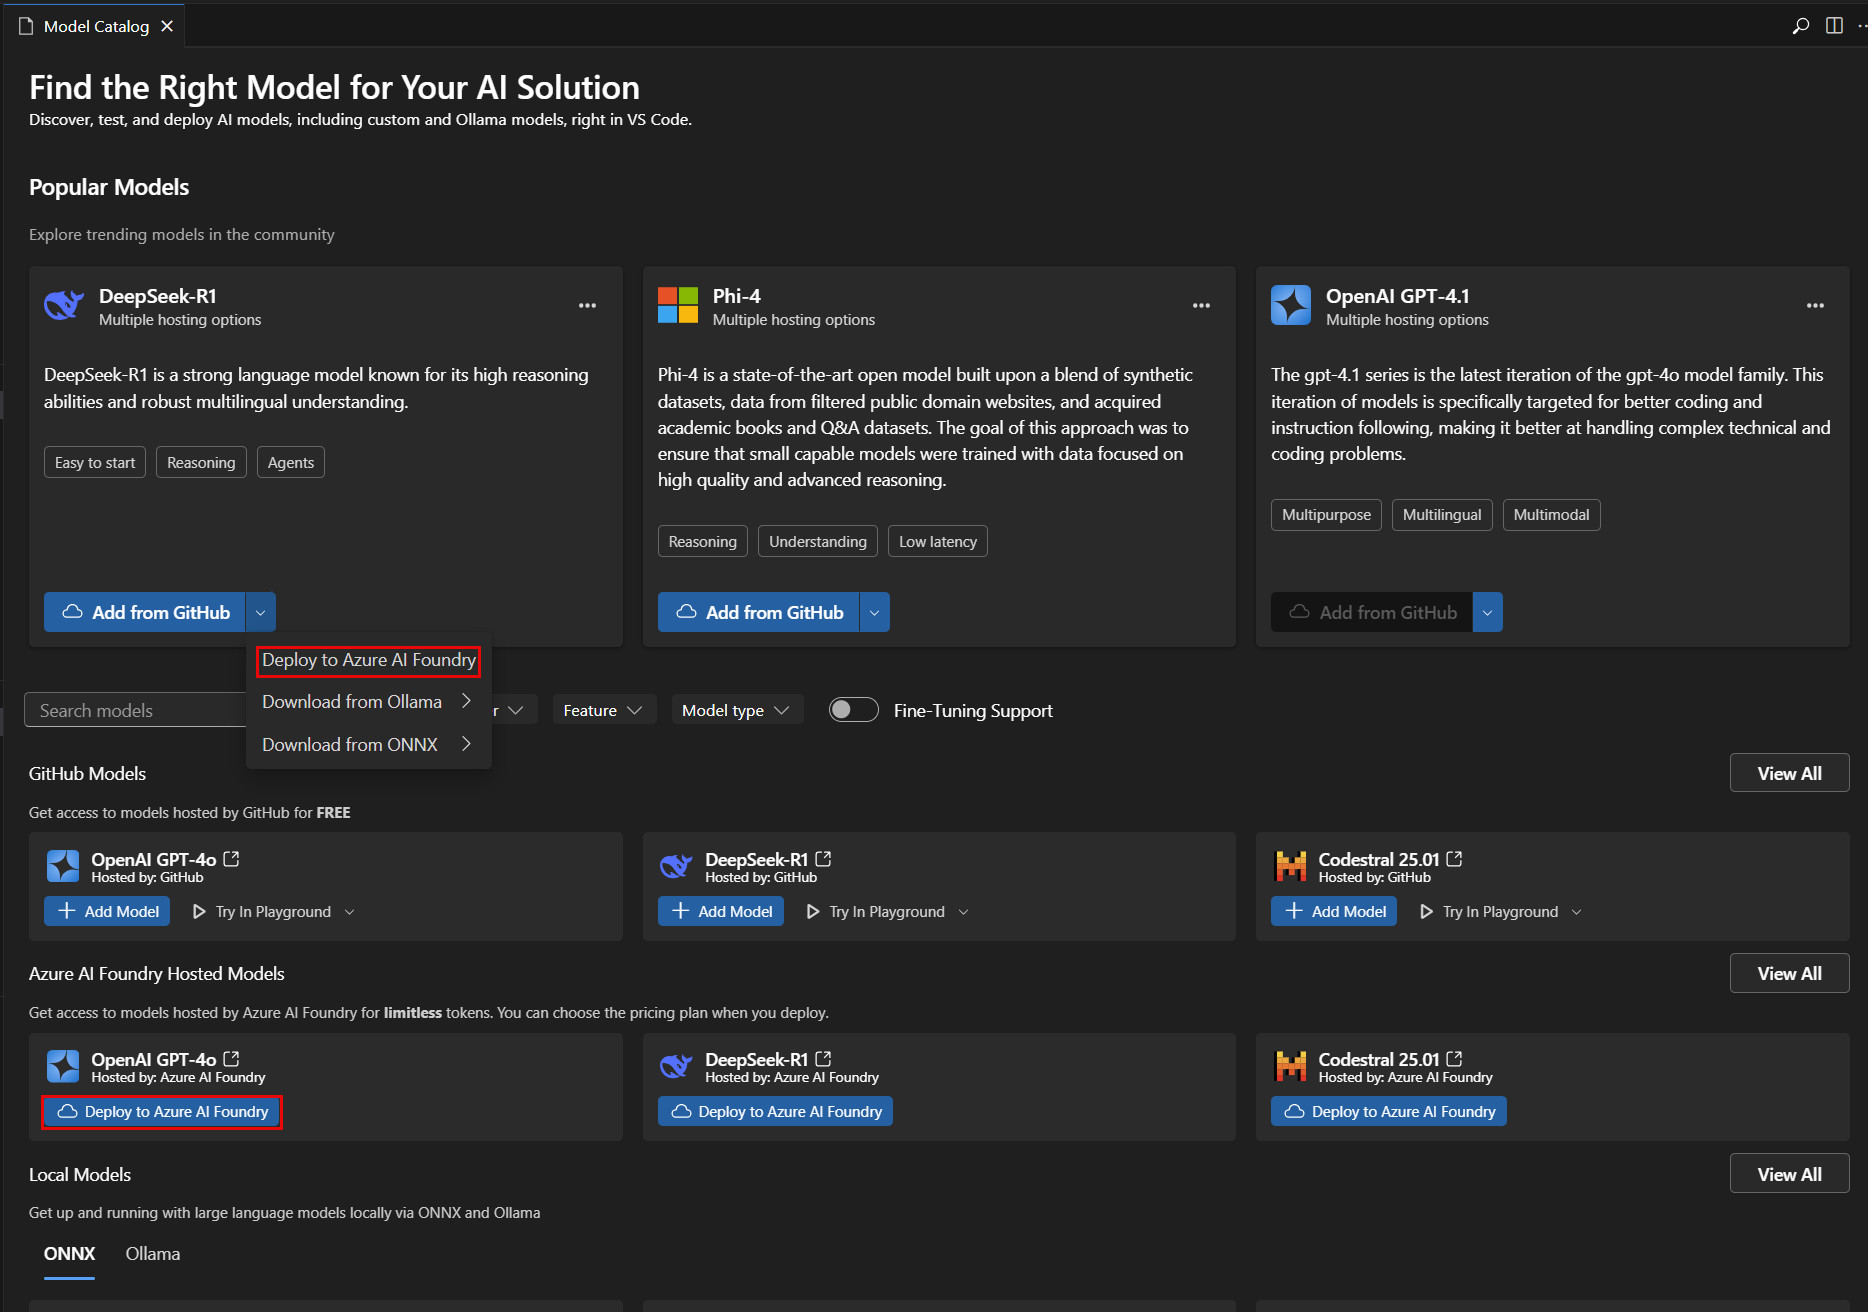
You can deploy a model to Microsoft Foundry directly from the AI Toolkit. This allows you to run the model in the cloud and access it via an endpoint.
From the model catalog, select the model you want to deploy.
Select Deploy to Microsoft Foundry, either from the dropdown menu or directly from the Deploy to Microsoft Foundry button, as in the following screenshot:
In the model deployment tab, enter the required information, such as the model name, description, and any additional settings, as in the following screenshot:
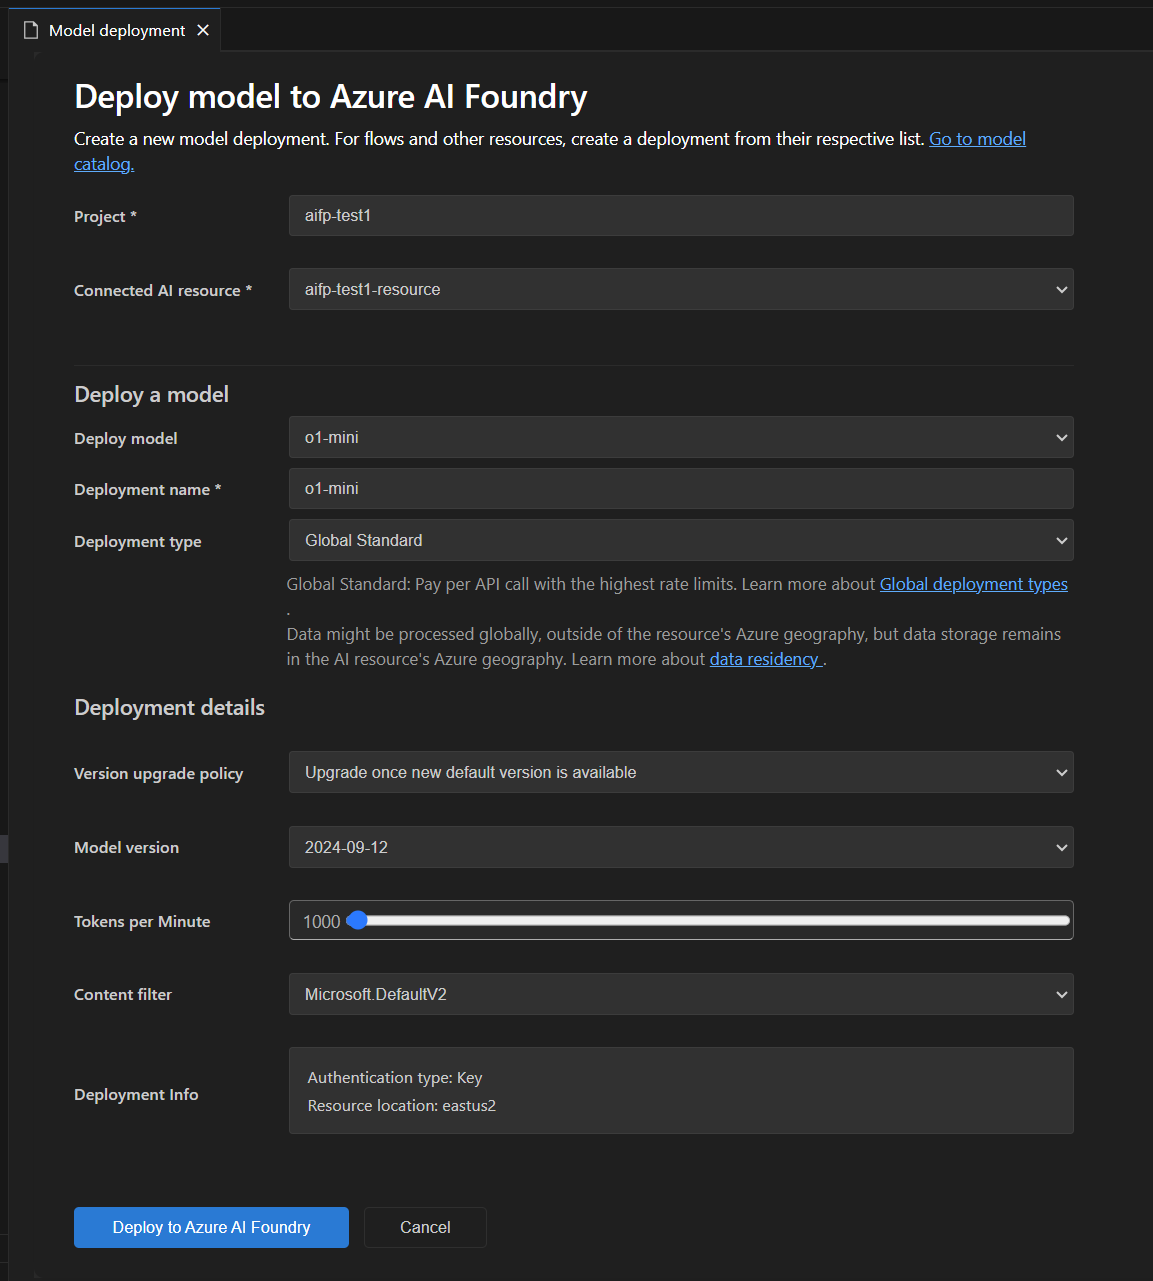
Select Deploy to Microsoft Foundry to start the deployment process.
A dialog will appear to confirm the deployment. Review the details and select Deploy to proceed.
Once the deployment is complete, the model will be available in the MY MODELS section of AI Toolkit, and you can use it in the playground or agent builder.
You can test a model in the playground for chat completions.
Use the actions on the model card in the model catalog:
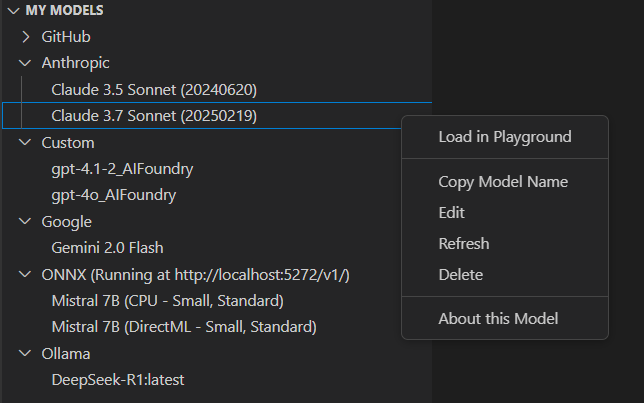
You can manage your models in the MY MODELS section of the AI Toolkit view. Here you can:
View the list of models you have added to AI Toolkit.
Right-click on a model to access options such as:
Right-click on ONNX section title to access options such as:
Some models require a publisher or hosting-service license and account to sign-in. In that case, before you can run the model in the model playground, you are prompted to provide this information.
In this article, you learned how to: